











How to Replace an Object in a Photo with AI: 8 Use Cases
A product photo has the right composition, but the table decoration belongs to last season. A room photograph would help explain your design proposal—if it showed a different chair. A restaurant campaign needs a new table setting, even though the original shoot is finished.
AI object replacement gives you a way to explore these changes using an existing photograph. Select the object, describe what should replace it, and review the generated version. Depending on the scene, you may need to refine the selection or prompt before the replacement looks convincing.
This guide explains how to replace an object in a photo with AI using EzEnhancer AI Generative Fill, followed by eight industry scenarios and prompts you can adapt.
What Does AI Object Replacement Do?
Object replacement generates a new visual element where an existing one appears. For example, you can select a table lamp and ask for a different lamp, or replace a ceramic cup with a small planter.
The selection is often called a mask. It tells the tool which area you intend to change. Your prompt describes the replacement, while the surrounding photograph provides visual context.
Choose the workflow that fits your goal:
| Your goal | Suitable approach |
|---|---|
| Remove a distraction and reconstruct the background | Object removal |
| Put a new object in an existing object's place | Generative Fill with a text prompt |
| Use a particular object's appearance as guidance | Generative Fill with a reference image |
Reference guidance is useful when a written description cannot communicate enough detail. It still requires review; a generated result should not be assumed to reproduce a specific product exactly.
How to Replace an Object in a Photo with AI
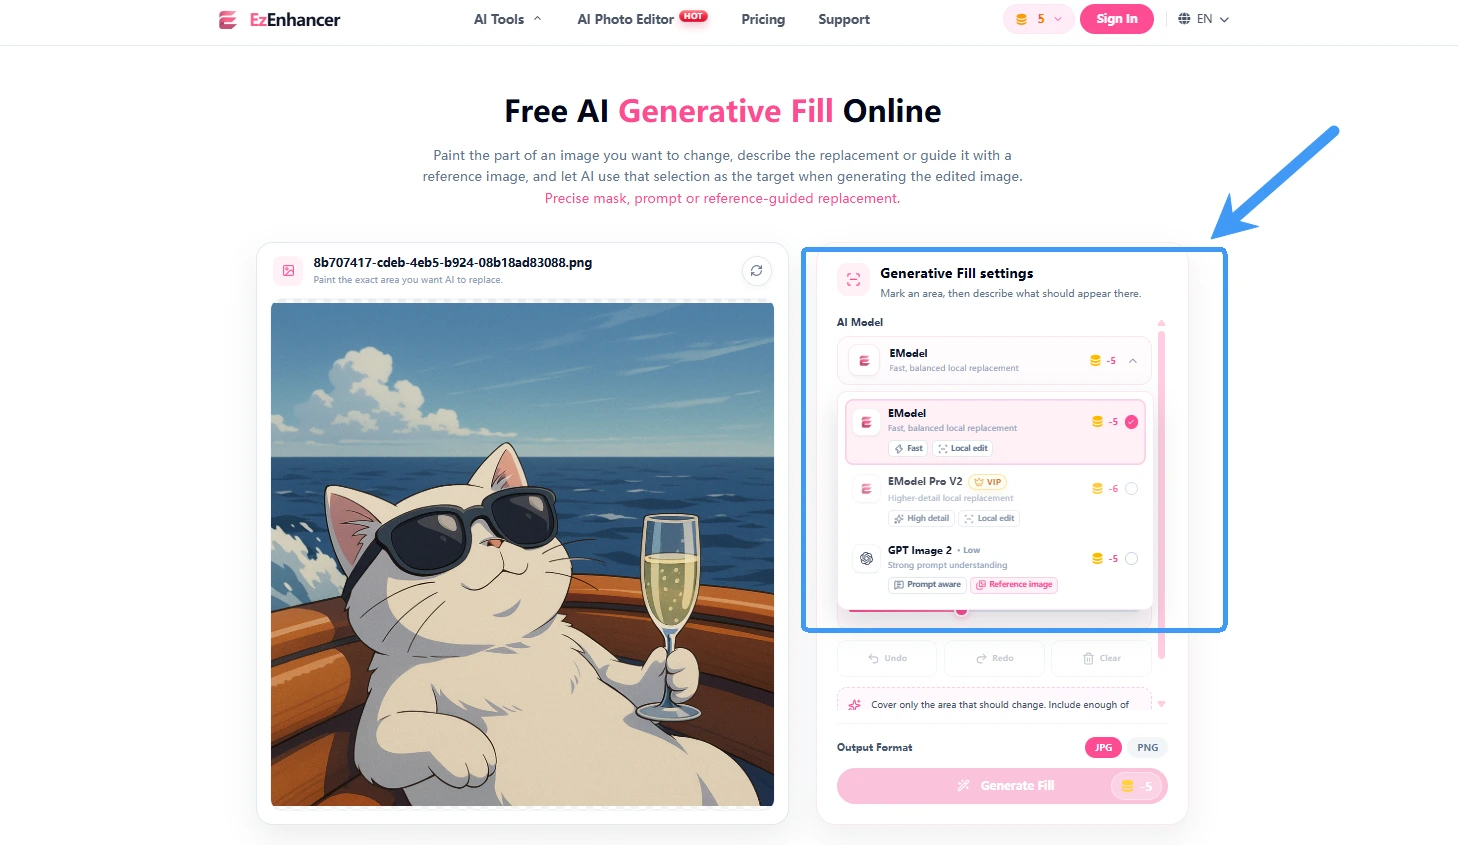
Start with one clear, isolated object. In the cover illustration, a pink selection marks an armchair and an arrow connects it to a different chair in the same room. The walkthrough below uses this furniture swap to explain the process.
1. Upload Your Photo
Open AI Generative Fill and upload your image. Choose a photo where you can see the object's outline, the surface beneath it, and the direction of the light.
Keep the original available for comparison. You will need to check both the replacement and the surrounding image.
2. Paint Over the Object
Cover the complete chair with the selection brush, including its back, arms, cushion, and visible legs. Leave a small margin around the outline without unnecessarily covering nearby objects.
If an old shadow or reflection remains after generation, review whether the selection needs to include that area. Keep enough surrounding scene visible to guide the edit.
3. Describe the Replacement
Write what you want to appear in the selected area. Include the details that matter for the scene: object type, material, color, approximate size, orientation, and placement.
For a first attempt, try:
Replace the selected armchair with a rounded cream boucle chair. Keep a similar footprint and orientation, match the window light from the left, and add a natural contact shadow on the rug. Preserve the surrounding room details.
This gives the model more useful direction than “make it look better.” Treat the prompt as an instruction to test, not a guarantee of the final result.
4. Add a Reference Image When Needed
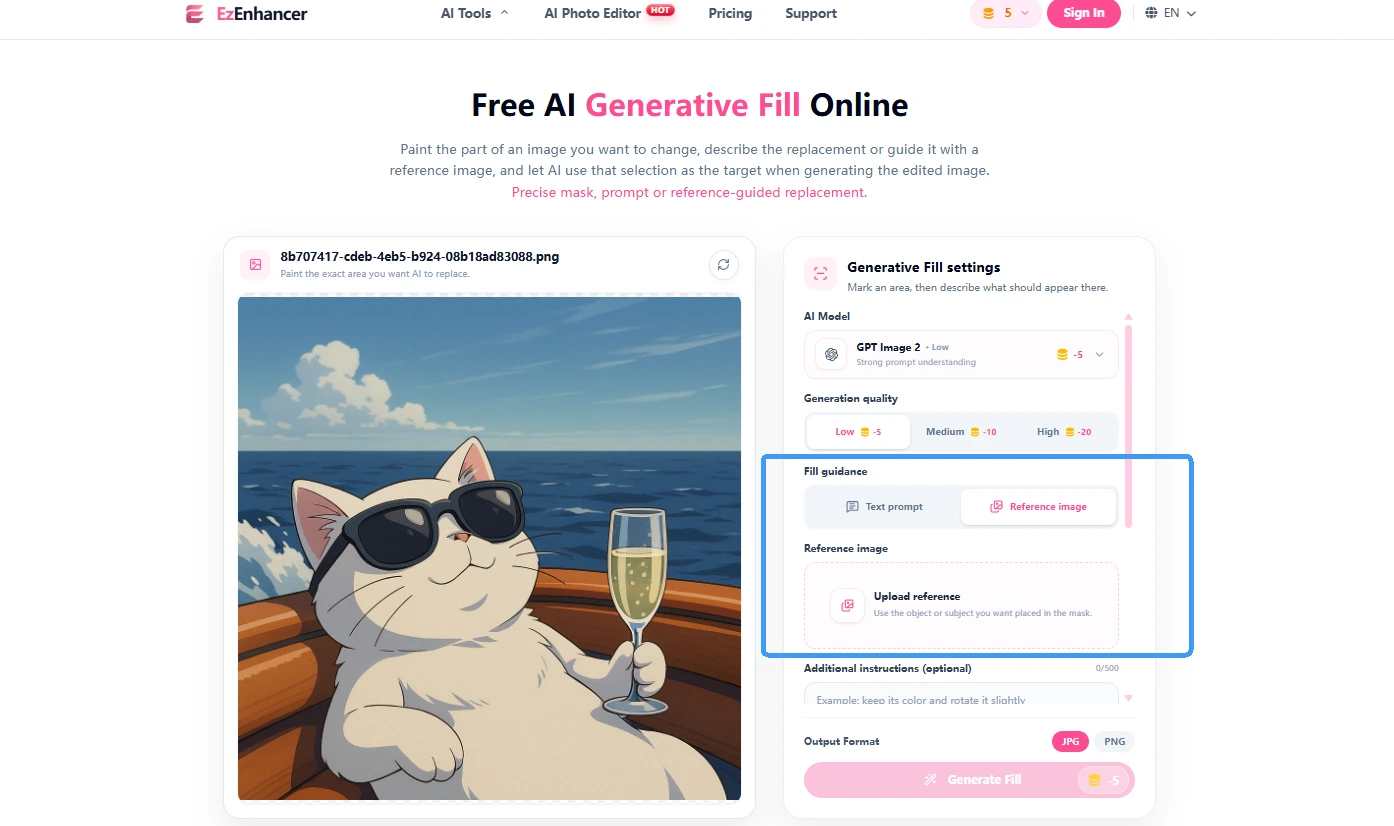
If you have a visual example, choose GPT Image 2 and switch to Reference Image mode. Upload the reference, paint the target area in your main image, and optionally add a short description to clarify the replacement.
Use a reference with a similar viewing angle where possible. A front-facing photograph of a chair offers limited information about what its back should look like.
5. Generate, Compare, and Download
Check the current credit cost shown before submitting the generation. Review the result at full size, paying attention to edges, scale, shadows, and nearby details. Adjust the mask or prompt if necessary, then download your chosen result.
EzEnhancer uses the whole image as context and may introduce small changes outside the selection. Compare faces, text, product details, and other important areas with the original before using the image.
8 Ways to Use AI Object Replacement Across Industries
Each example below pairs an industry need with a concept image and a starting prompt. Adapt the prompt to your own photo; these examples are not measured case studies.
1. Ecommerce: Refresh Props Around a Product
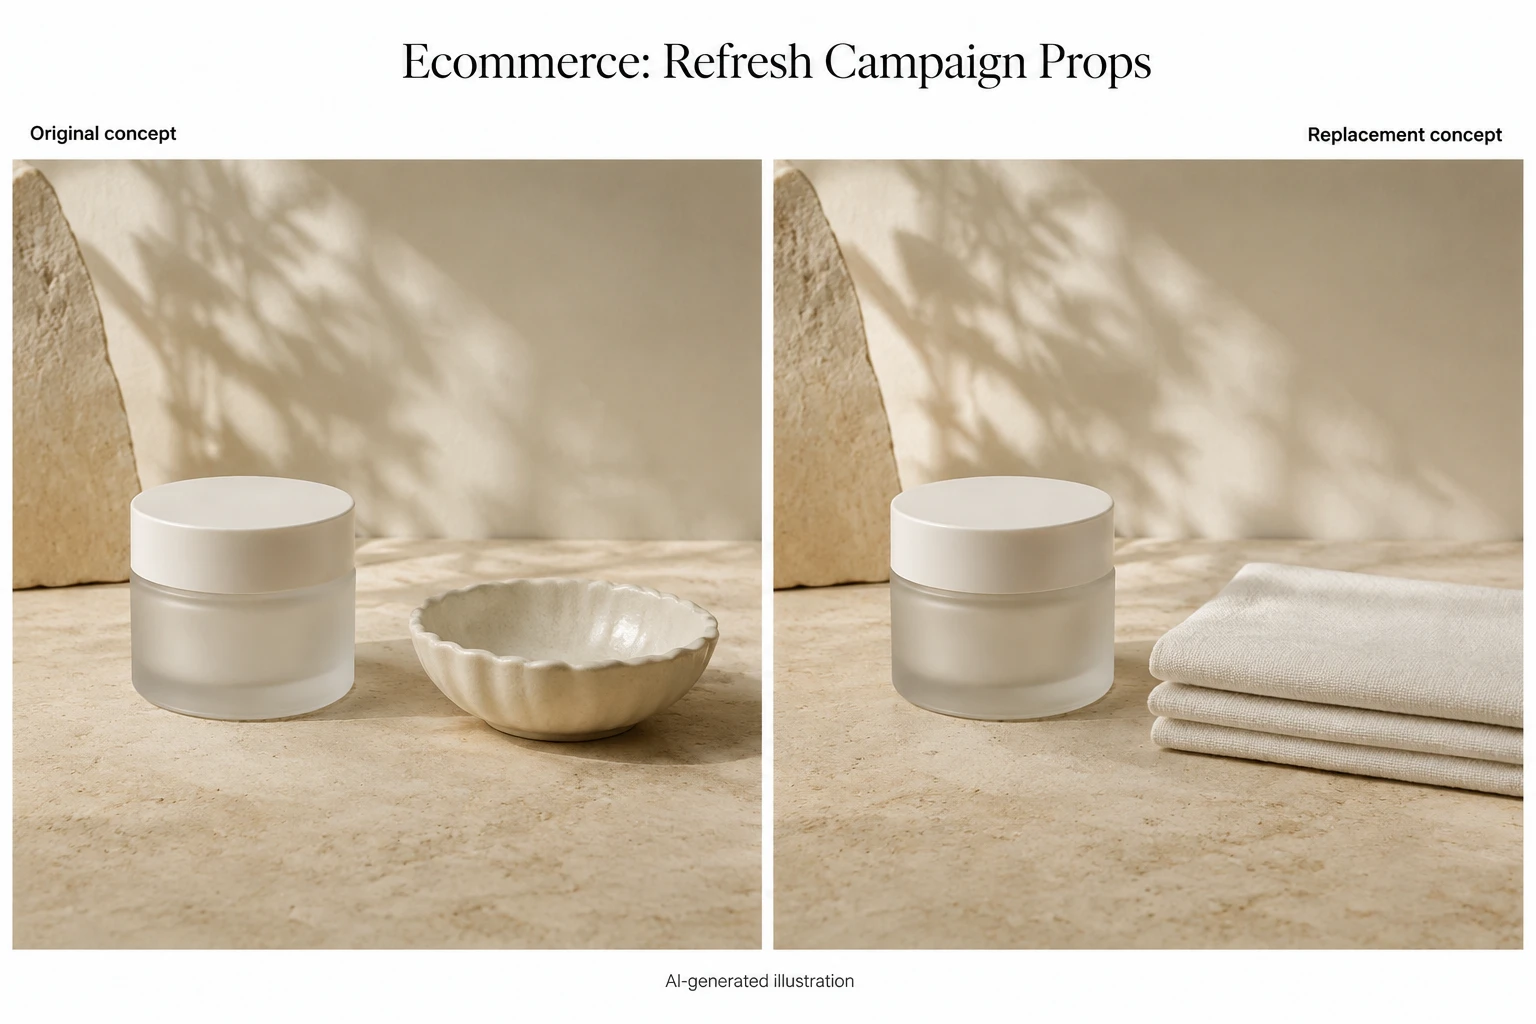
A skincare brand might have a useful photograph of a moisturizer jar beside a decorative bowl. Replacing the bowl with a different prop can help explore a new campaign direction without redesigning the entire composition.
Example swap: Decorative bowl → folded linen towel.
Starting prompt:
Replace the selected bowl with a neatly folded ivory linen towel on the same surface. Use soft studio lighting and a subtle shadow beneath the towel. Preserve the nearby moisturizer jar and label.
Useful for: Seasonal campaign concepts, social posts, and promotional layout drafts.
Check before use: Compare the jar, logo, label, and packaging with the original. A request to preserve them does not lock those pixels. If the image will sell a specific item, accurate product details remain essential.
2. Interior Design: Preview Furniture Alternatives
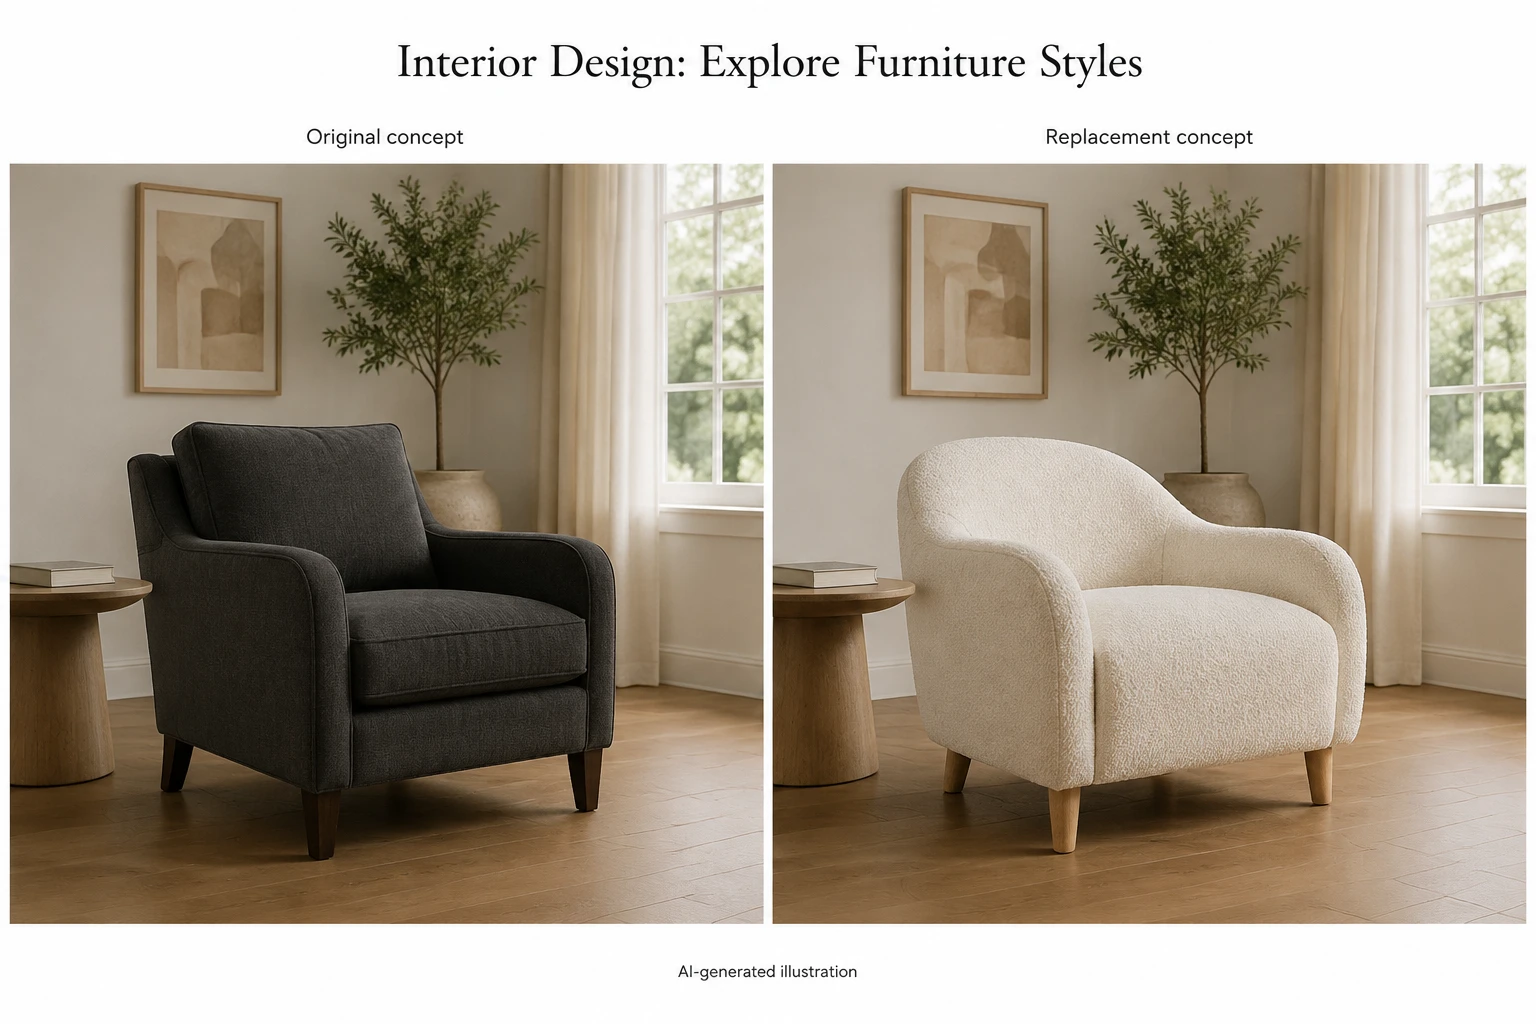
Interior designers can use object replacement to communicate how a different furniture style might feel in an existing room. A single chair swap gives clients a focused comparison.
Example swap: Dark armchair → light fabric accent chair.
Starting prompt:
Replace the selected armchair with a cream boucle accent chair with rounded arms and light oak legs. Keep a similar footprint and orientation. Match the window light from the right and the floor perspective.
Useful for: Design consultations, mood boards, and furniture styling proposals.
Check before use: Review leg placement, floor contact, perspective, and clearance around adjacent furniture. Present the image as a concept; it does not verify dimensions or whether a particular chair fits the room.
3. Real Estate: Create Clearly Labeled Staging Concepts
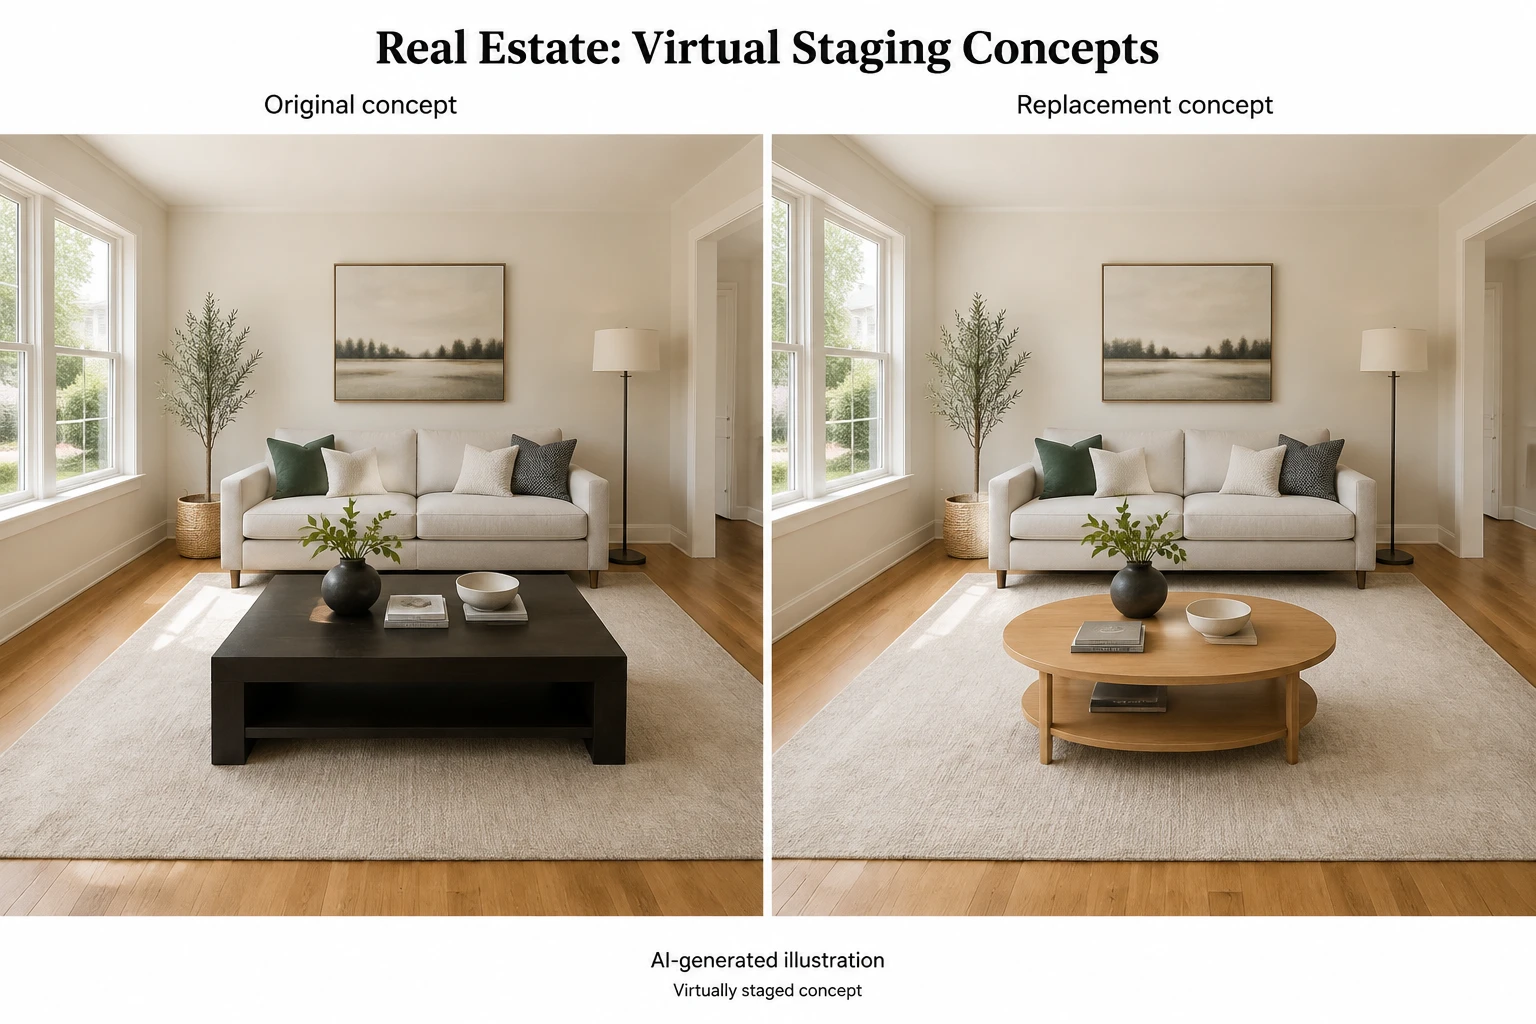
Property teams can explore furnishing options that help viewers imagine an occupied space. Replacing dated staging furniture may communicate a different aesthetic while retaining the room's basic layout as the intended context.
Example swap: Bulky coffee table → compact oval table.
Starting prompt:
Replace the selected coffee table with a compact oval oak coffee table in the same position. Match the existing camera angle and daylight. Preserve the surrounding sofa, flooring, windows, and room layout.
Useful for: Labeled virtual staging concepts and presentation materials.
Check before use: Compare all architectural details with the original. Label the image as virtually staged and distinguish proposed furnishings from what is actually present. Avoid presenting a generated change as evidence of the property's condition.
4. Restaurants: Explore Table Styling for Campaigns
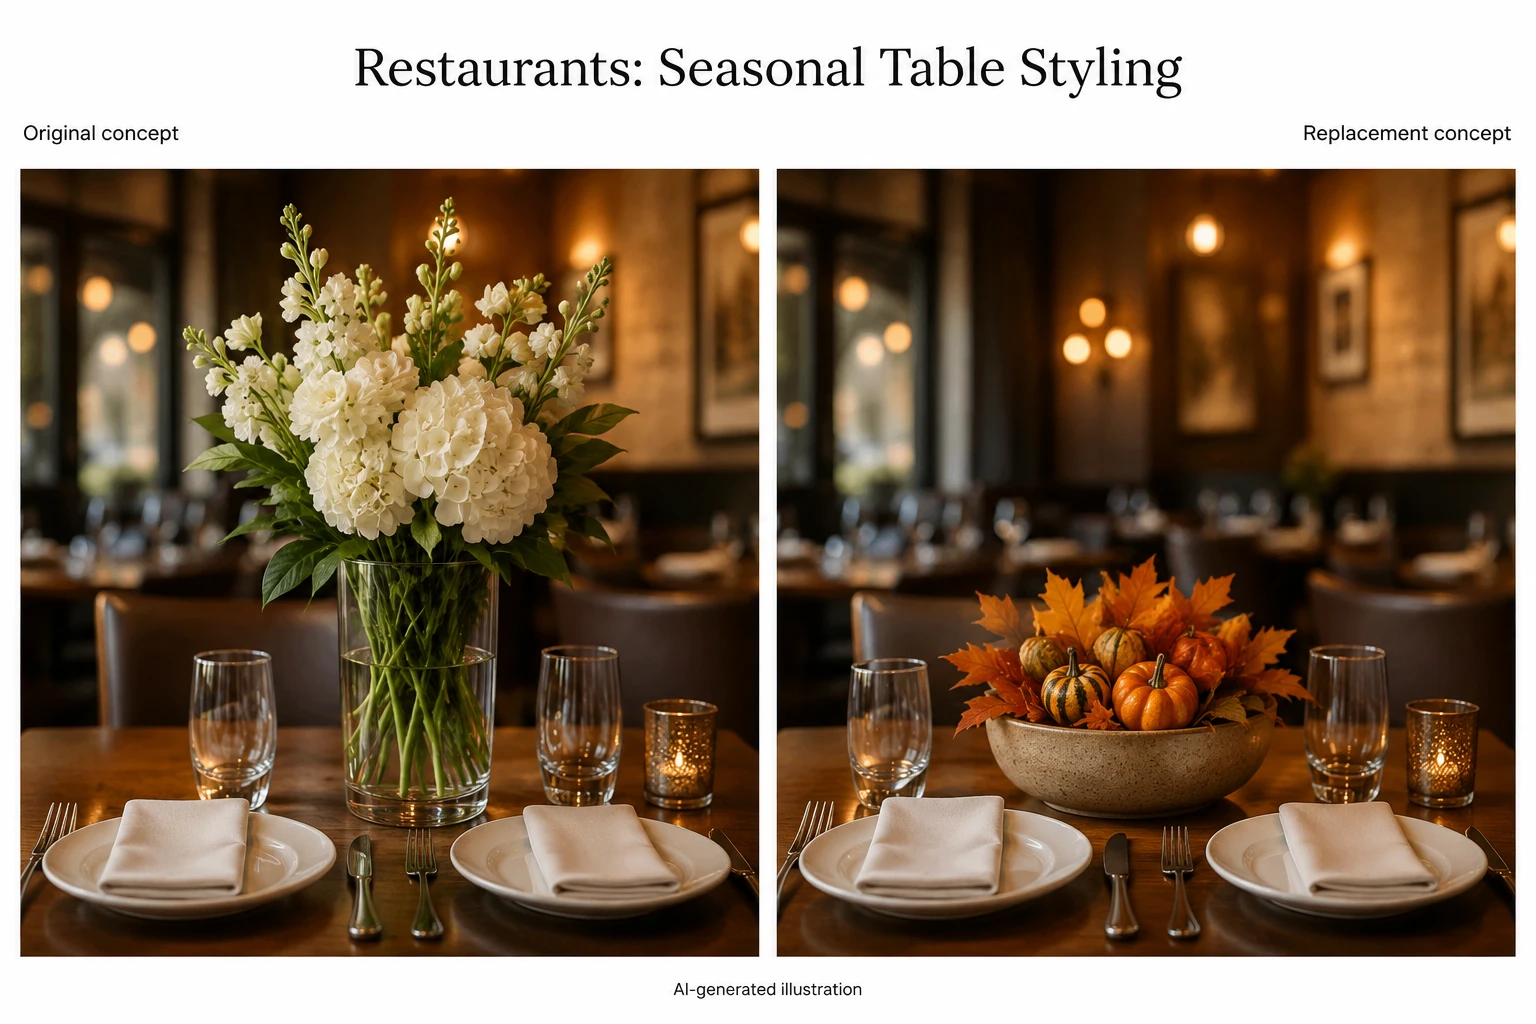
A restaurant's dining-room image may be suitable for several campaigns if the table styling changes. Object replacement can help explore decor around the food rather than altering the dish customers expect to receive.
Example swap: Tall centerpiece → low seasonal arrangement.
Starting prompt:
Replace the selected centerpiece with a low ceramic bowl holding autumn leaves and small decorative gourds. Keep it below the diners' sightline and match the warm overhead restaurant lighting.
Useful for: Seasonal social creative, event styling proposals, and restaurant campaign drafts.
Check before use: Inspect plates, food, utensils, and glassware for unintended changes. Keep menu images representative of the dish and portion actually served.
5. Fashion: Test Accessory Styling Directions
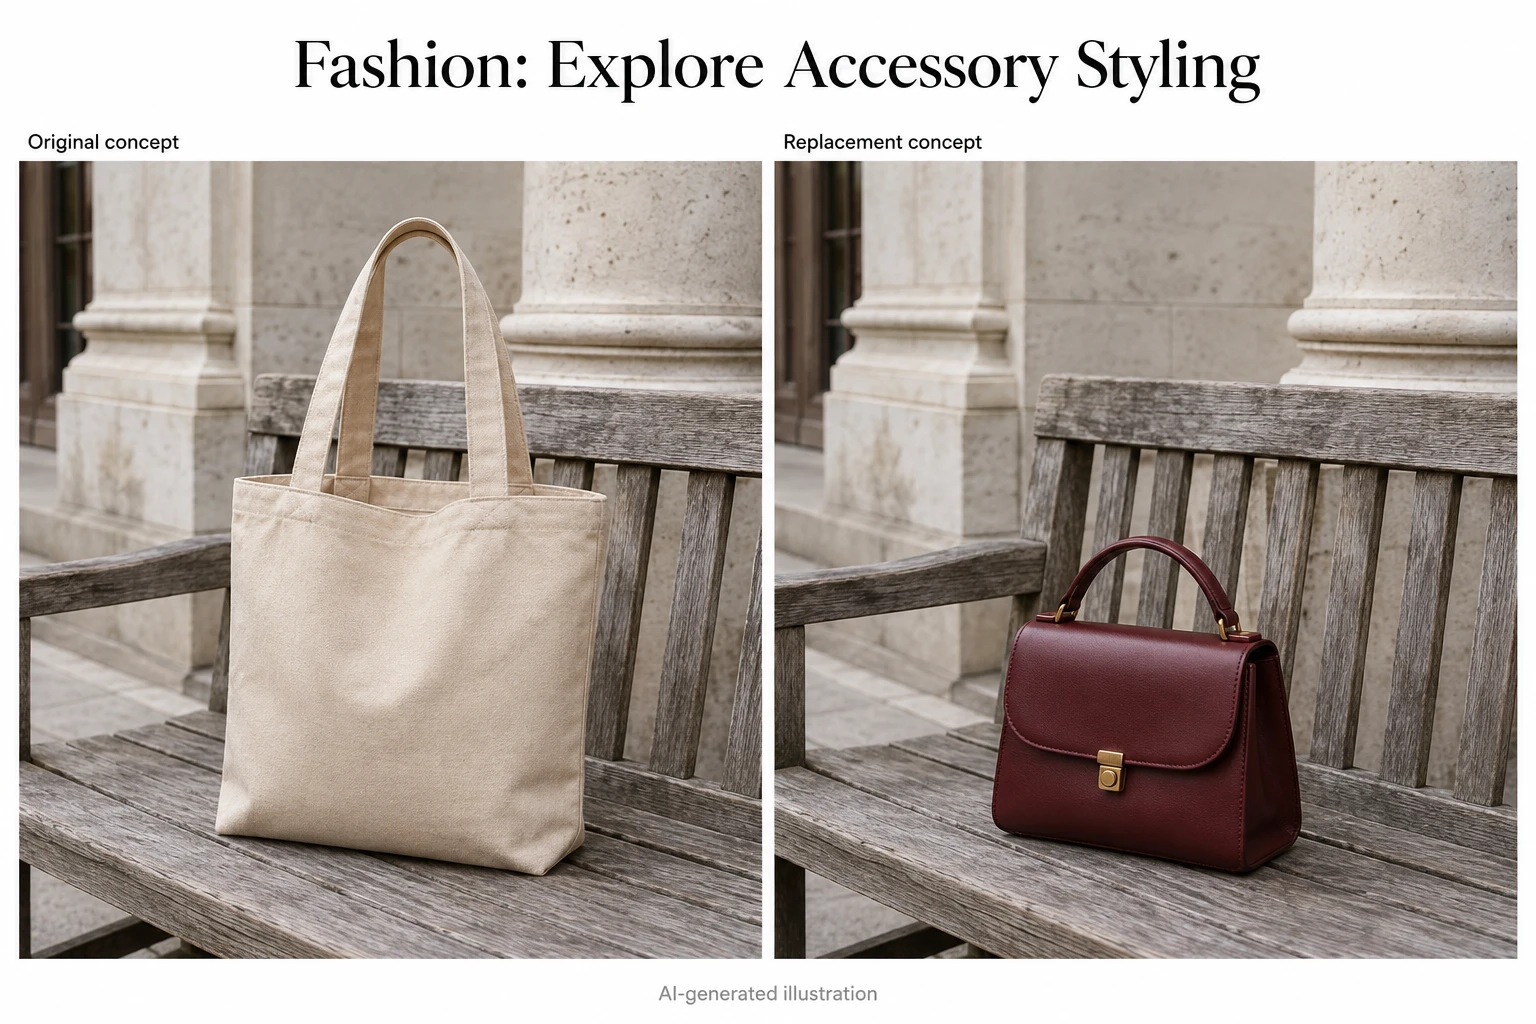
Fashion teams can explore whether a different accessory changes the mood of an outfit before arranging a new shoot. Begin with an accessory placed beside the model; objects held in a hand need closer review.
Example swap: Tote bag on a bench → structured handbag.
Starting prompt:
Replace the selected tote bag on the bench with a small structured burgundy leather handbag with a short top handle. Match the side view, overcast daylight, and soft shadow on the bench.
Useful for: Styling proposals, lookbook concepts, and campaign mood boards.
Check before use: Examine straps, buckles, stitching, and the relationship between the bag and nearby clothing. If promoting a specific SKU, verify the generated details against the real item; use a reference image for guidance when available.
6. Hospitality and Travel: Visualize Decor Updates
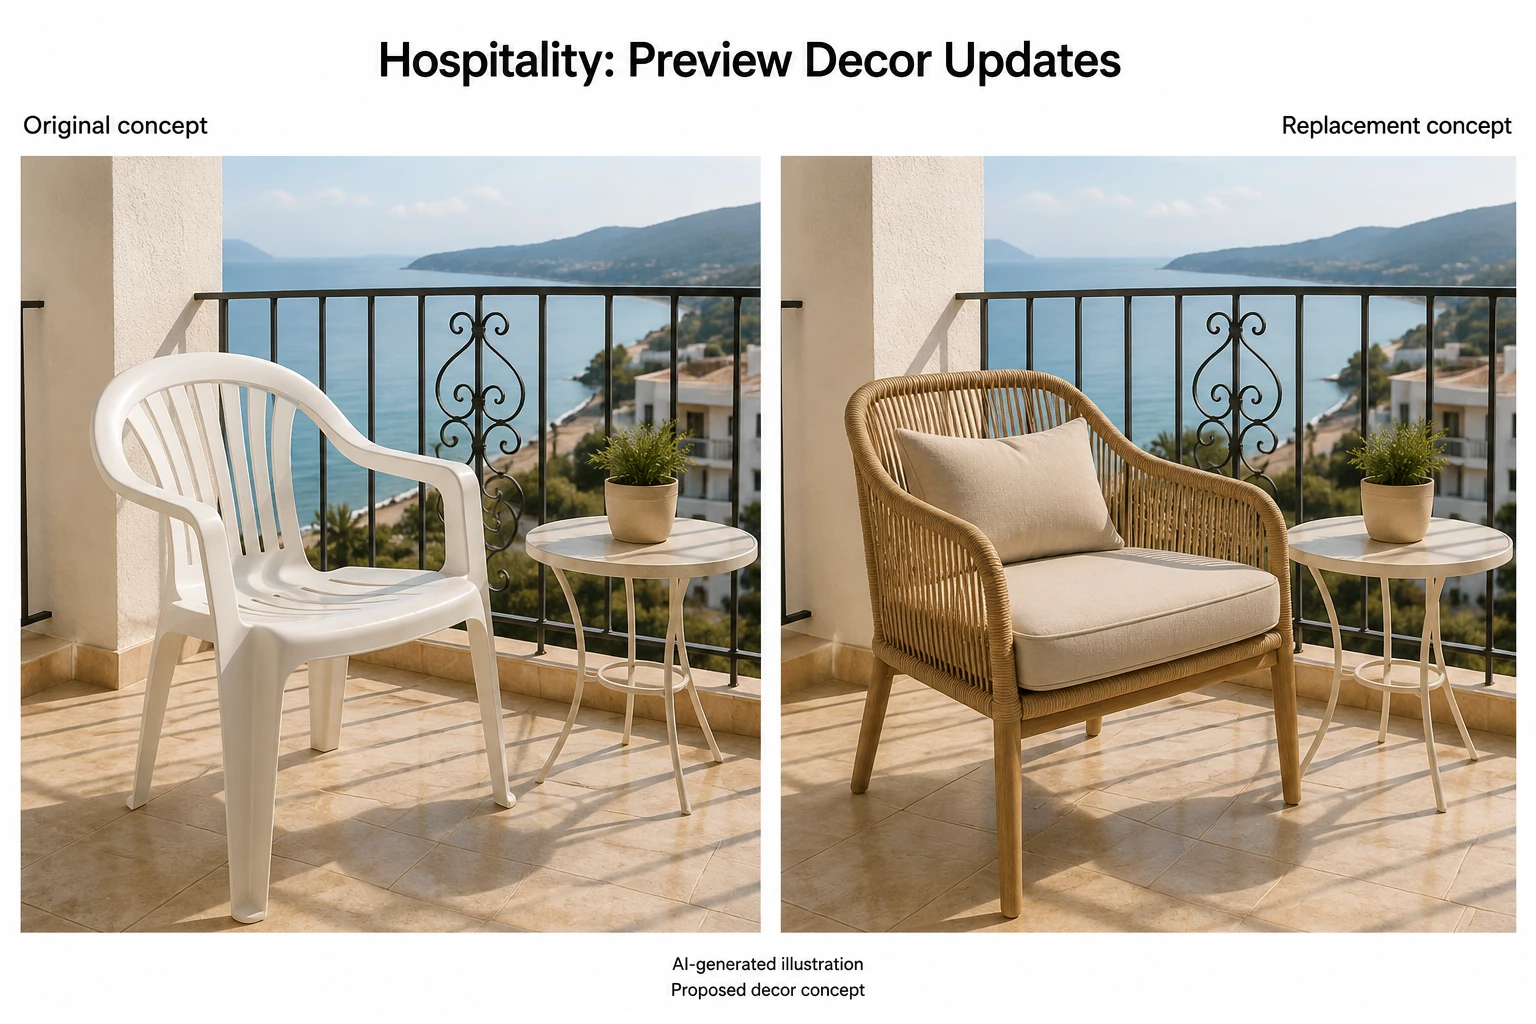
A hotel or travel brand can explore how refreshed furnishings or decorations might appear in an existing photograph. This is particularly useful for discussing proposals with designers and marketing teams.
Example swap: Plastic balcony chair → woven lounge chair.
Starting prompt:
Replace the selected plastic chair with a natural woven lounge chair and a neutral seat cushion. Keep the same orientation and approximate size. Match the afternoon sunlight and shadow direction on the balcony floor.
Useful for: Renovation proposals, decor comparisons, and internal campaign planning.
Check before use: Confirm that railings, views, room features, and other furniture remain accurate. Use proposed amenities in clearly identified concept materials; booking photography should represent what guests can expect.
7. Advertising Agencies: Develop Visual Variations
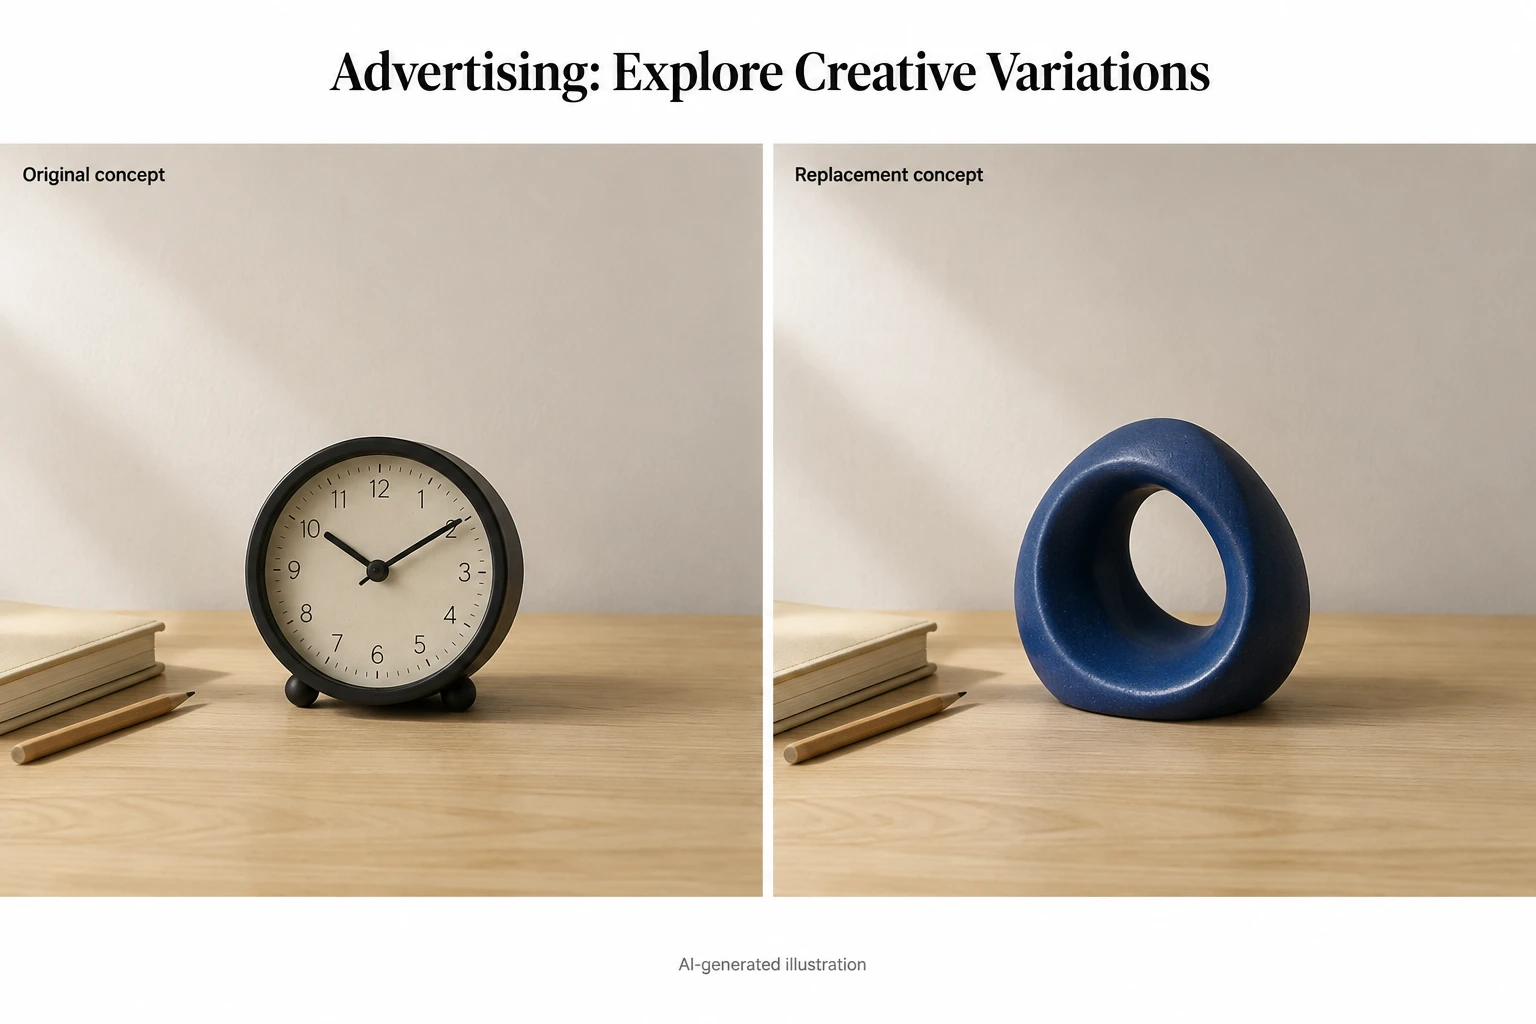
An agency may need several versions of a creative concept before selecting a direction. Changing one prop at a time makes it easier to compare how color, material, or symbolism affects the composition.
Example swap: Desk clock → playful desk sculpture.
Starting prompt:
Replace the selected desk clock with a small cobalt-blue abstract ceramic sculpture. Keep it within the clock's original footprint, with the same camera angle and soft studio lighting. Preserve the open space on the right.
Useful for: Creative pitches, storyboard frames, and ad layout exploration.
Check before use: Review the space reserved for copy and any brand assets. If using versions in a performance test, confirm that unintended differences do not undermine the comparison.
8. Event Planning: Show Decoration Options
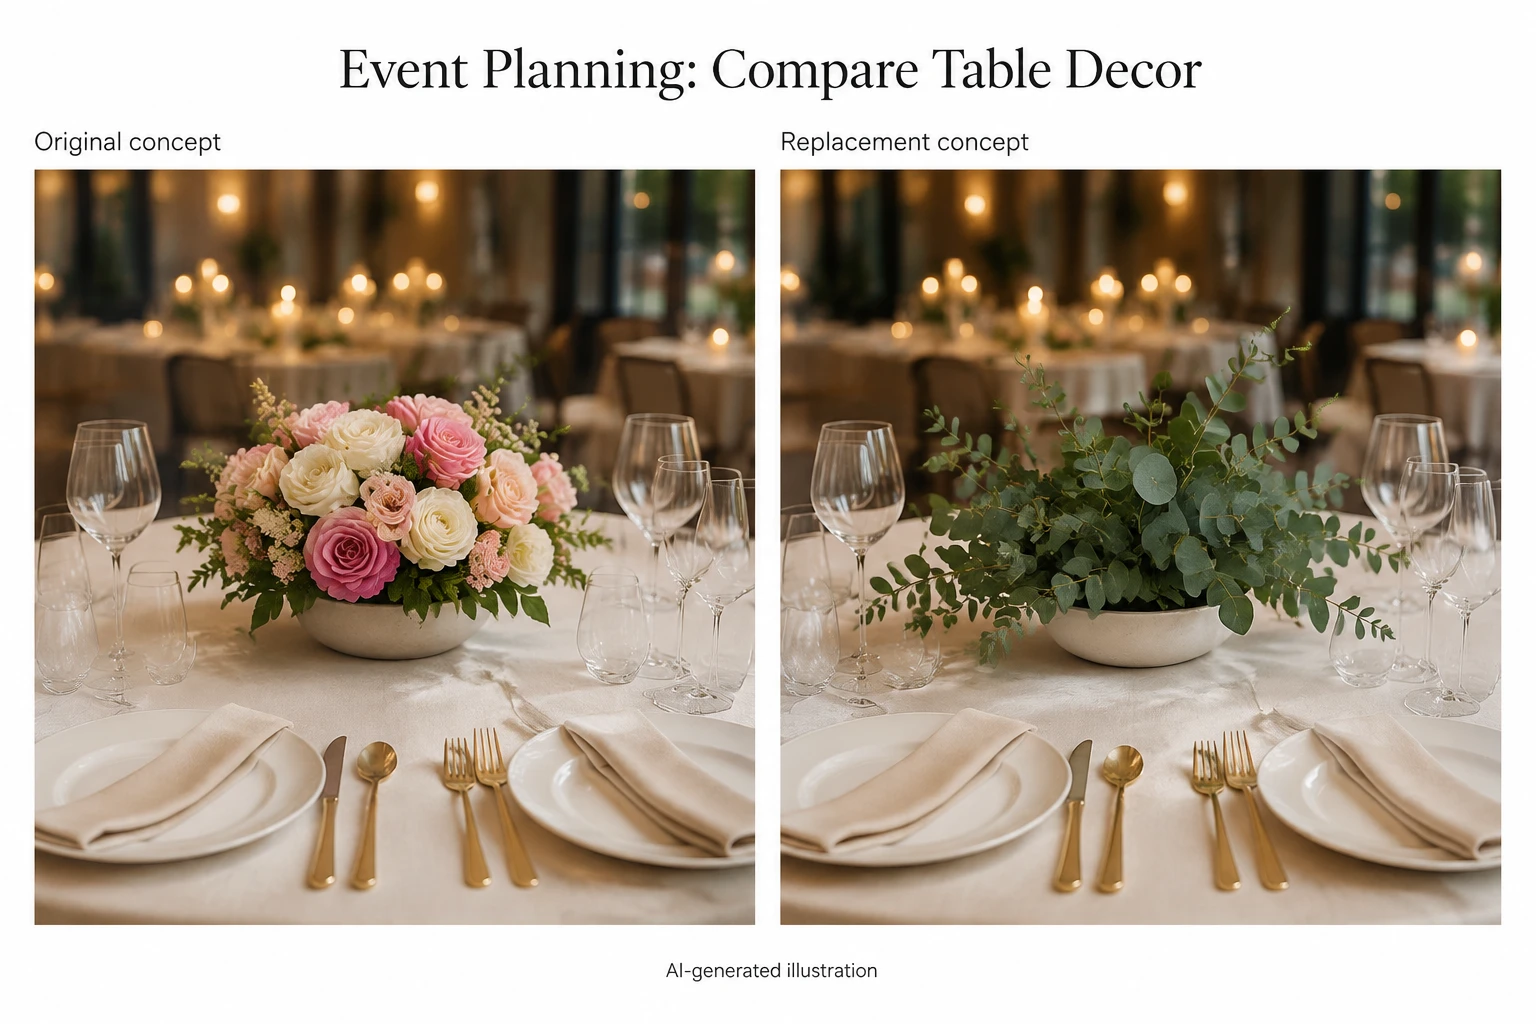
Event planners can use a photograph of a venue to discuss alternative centerpieces or table decorations. A visual proposal can make choices about height, color, and style easier to communicate.
Example swap: Floral centerpiece → greenery arrangement.
Starting prompt:
Replace the selected floral centerpiece with a low arrangement of eucalyptus foliage in a shallow matte-white bowl. Keep the neighboring place settings visible and match the warm indoor lighting.
Useful for: Client proposals, wedding mood boards, and corporate event styling discussions.
Check before use: Inspect tableware and repeated patterns for distortions. Confirm the actual arrangement's dimensions, materials, and availability separately before promising the setup to a client.
A Prompt Formula You Can Reuse
For most object swaps, start with this structure:
Replace selected object with new object, material, and color. Use size and orientation. Match lighting and camera angle. Preserve important surrounding details.
Keep the instruction focused on one replacement. Add details to solve a visible problem rather than combining several unrelated scene changes in one prompt.
For example, if a replacement vase looks too large, specify “a short vase approximately the height of the original cup.” If its finish looks wrong, describe “matte ceramic” instead of simply asking for a more realistic result.
Preservation instructions communicate intent, but you still need to compare the generated image with the original.
Fix Common AI Object Replacement Problems
| Problem | What to try next |
|---|---|
| Part of the original object remains | Expand the mask to cover the complete outline, including handles or thin parts. |
| The replacement looks pasted on | Specify light direction, surface contact, and camera angle; inspect the selection boundary. |
| The new object is too large or small | Describe its size relative to the original object or a nearby item. |
| An old shadow or reflection remains | Review whether that area also needs to be included in the edit. |
| The reference object looks different | Try a clearer reference at a closer viewing angle and check important details individually. |
| Nearby text, faces, or products changed | Try a tighter selection and simpler prompt; compare again with the original. |
Change one factor at a time so you can see whether the mask, reference, or prompt improves the result. If exact product identity or unchanged surrounding pixels are required, additional editing or original photography may be necessary.
Frequently Asked Questions
Can I Replace an Object Without Photoshop?
Yes. EzEnhancer AI Generative Fill runs in a web browser. You can upload a photo, paint a selection, and generate a replacement without installing Photoshop.
Can I Replace an Object with Something from Another Photo?
Yes. Choose GPT Image 2 and Reference Image mode to provide a separate image as visual guidance. Review the result for differences in shape, color, branding, and other identifying details.
Will the Rest of the Photo Stay Exactly the Same?
Not necessarily. The mask identifies the intended target, but EzEnhancer processes the whole image as context. Small variations can occur outside the selected area.
Is AI Generative Fill Free to Try?
EzEnhancer offers daily trial credits. Check the current generation cost and available credits in the interface before submitting an edit.
Which Scenario Should I Try First?
Choose a clearly visible tabletop prop with a simple outline. Once you are comfortable selecting the object and checking the result, move to furniture, reflective surfaces, or objects that overlap other subjects.
Try One Object Swap in Your Own Photo
Choose an existing image and one change that would make it more useful: a new campaign prop, an alternative chair, or a different table decoration. Start with a focused selection and one of the prompts above, then compare the generated result with the original.
How to Remove People from Photos Without Ruining the Background
Learn how to remove people from a photo while protecting faces, architecture, shadows, and detailed backgrounds with a careful AI editing workflow.
Restore, Colorize, or Upscale Old Photos First?
Learn the best AI workflow for old family photos: when to restore damage, colorize black-and-white images, unblur faces, or upscale for printing.